


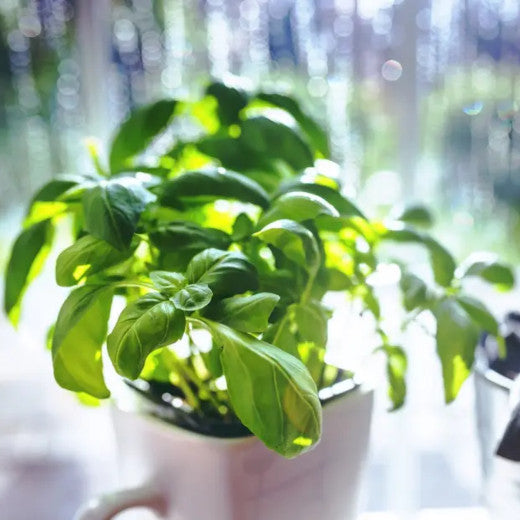
Basil, thyme, sage, mint, oregano and parsley.
Who doesn’t love the taste of these fresh herbs in their cooking? Well Divas, it’s time to bring that taste to your dorm or apartment! Instead of paying supermarket prices for these herbs, why not try growing them at home? College comes along with new expenses and saving money is on the mind of most college students. An indoor vegetable and herb garden can help save money in many ways; plus it can get you started on a journey to not only a new hobby but potentially also a healthier lifestyle. We know that when it comes to student living, space is limited, so we are going to focus our tips on growing herbs in a small space.
Fortunately, it’s not difficult to grow these herbs indoors, even in small spaces. All you need is a pot, some soil, a few herb plants of your choosing, and a nice place in the sun for them to grow. If you still don’t think you have the green thumb that you need to make this project work, then here are some great tips to make sure you have fresh herbs all year round!
My Herb Growing Recipe
1. The first thing you need to think about is location.
Plants need an ample amount of sunlight so pick the sunniest spot in your dorm, room, or apartment. Window sills are a great location but if you don’t have one you can easily place your herbs on a table or desk in a nice sunny spot. Remember, the sun’s energy provides food for your plants so it is essential for a healthy herb garden. A lot of herbs also only need partial sunlight which makes indoor herb gardens so successful.
2. Choose the herbs you want to grow.
We recommend growing the herbs you use the most first such as cilantro, mint, parsley, and basil. There are also some great herbs you can grow for natural remedy purposes. For example, mint is a great calming herb that can help with headaches and can also help with digestion.
3. Find the right container for your plants.
Depending on the amount and variation of herbs you want to grow, there are many different options you could go with when choosing how to contain and grow your herbs. You could use the classic terracotta pots, or even recycled bottles can work great. You can find many great ideas on Pinterest and we have a few examples for you to check out below. Remember: any container you use must have proper drainage either in the form of holes in the bottom (don’t forget to put a plate underneath to catch any excess water) or put some rocks in the bottom of your pots to create space for excess water.
4. Add soil to the mix.
This you may need to purchase from your local garden store, but depending on the time of year a lot of other stores can also have soil available. We recommend regular potting soil which has the added nutrients needed for growing seedlings.
5. It’s time to start planting!
We recommend starting with your herbs in sprouted seedling form as they will grow faster and more easily. When planting, make sure to research each herb before putting them in the soil as different herbs have different soil depth requirements.
6. Water as needed.
Once your seedlings have been placed in their new home, it’s time to add water! You will want to try your best to keep the soil moist by watering them as needed. A great general guideline is to check the soil daily to see if more water is needed. It’s also important to note that some herbs may need more frequent watering while others will need less.
7. Help them grow until fully mature.
A good tip to remember when your herbs are ready is to never harvest more than one third of the plant at a time. This allows that one third to grow back and allows the plant to last much longer. Tip: Never harvest the largest bottom leaves as they are the main food gathering source of the plant and help keep your herbs growing.
8. It’s time to eat!
Cut up some of your delicious fresh herbs and throw them into your favorite recipe and enjoy! It is unbelievable what a difference fresh herbs can make to your culinary experiments!
So now that you have the basics down, here are some great extra tips that could help make things go a little smoother as you get started with your very own herb garden!

A Few Extra Tips and Tricks
- If you are a bit unsure of what herbs to start your gardening project with, we recommend basil or mint as a great first herb. Both basil and mint grow quickly with relatively little maintenance and they have many uses in cooking and other remedies. Be careful when growing mint to keep it contained because it can spread very easily and, if allowed will, take over your herb garden.
- How to trim your herbs properly. We recommend that you cut your herbs just above a set of growing leaves and keep on taking from the top as this will allow the herbs to grow new shoots. Once your plants have flowered they will not last too much longer, but if you continue to cut them back they will continue to grow for several months.
- Plants also like heat so make sure the space you keep your herbs is warm enough and if they are on a window sill make sure the window is not drafty.
- Remember that before starting your herb garden, make sure to also do your own research for any specific requirements the herbs you chose might have. Every herb can be a little different when it comes to care, harvesting, and cooking.
Now that you have your instructions and tips in the front of your mind, you can start to think about how you will set up your personal herb garden. The best thing is that not only will your functional indoor garden add to your home cooking but it will also add to your overall environment! Plants in your living space help with air quality, and even mood, so let’s make it unique. There are tons of different ways to make this project your own!


